Getting started
Sawfish is designed to simplify your invoicing process and integrate seamlessly with Xero & MYOB, saving you valuable time. Getting started is quick and easy — just follow these steps and you’ll be ready to send your first invoice in no time.
Complete the onboarding steps
Complete the Sawfish onboarding to set up your account and start managing invoices. Click below to get started.
Start onboardingSet up invoice email reminders
Once you’ve completed the onboarding, head to the Invoice Settings page in Sawfish. Here you can configure your email reminders so your customers never miss an invoice.
Go to my invoice settingsTurn off invoice reminders in your accounting software
Log in to your Xero or MYOB account and disable automatic invoice reminders. Sawfish takes care of reminders for you — this prevents duplicate emails being sent to your customers.
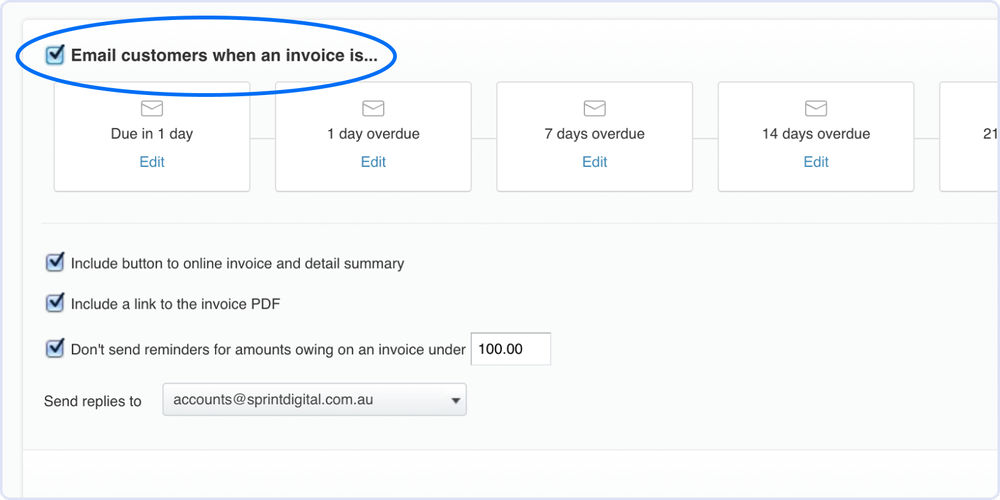
In your Xero invoice reminder settings, untick “Email customers when an invoice is…” to switch automatic reminders off.
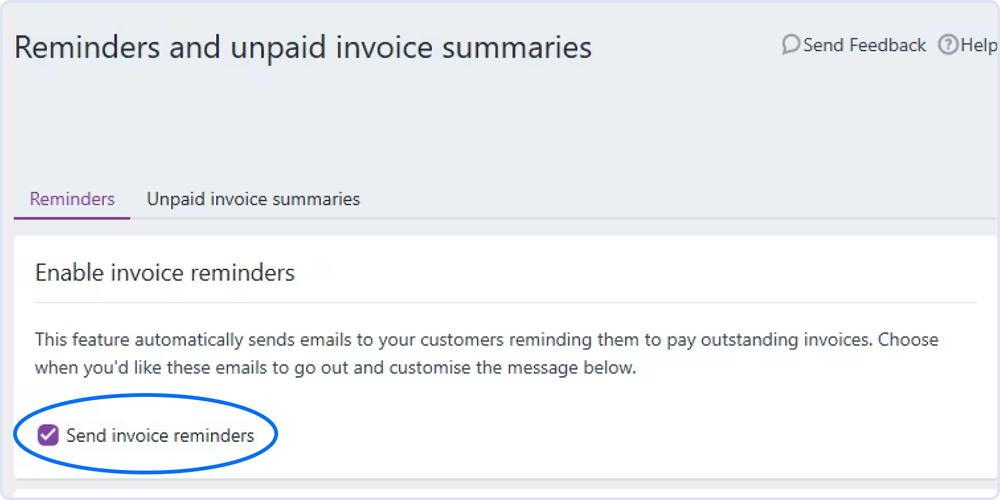
In MYOB, open Reminders and unpaid invoice summaries and turn off Send invoice reminders.
Raise and approve invoices in Sawfish, Xero or MYOB
You’re ready to create your first invoice — here’s how.
- From Invoices, click ‘Create New’, build your invoice and click Approve & Email.
- The invoice sends from Sawfish and automatically synchronises back to your connected Xero or MYOB organisation.
- Create the invoice in Xero or MYOB as you normally would.
- Click ‘Approve’ once the invoice is ready.
- Sawfish automatically sends the approved invoice to your client for a seamless experience.
Important: Do not send the invoice manually from Xero or MYOB.